
StarX Garden
Gardening is my favorite hobby. I love any kind of plant or flower, but I especially like growing vegetables. My kids say I can make anything grow!
I live with one of my daughters and her family now. I moved in right after my heart surgery. Before that, I owned a condo and would walk to my daughters to work in my garden. When I moved back to Michigan from Daytona Beach, Florida, she and her husband let me have my own spot in the side yard to plant my first garden in 15 years! I really missed that! I enjoy it so much! Now all I do is go out the door and I'm there, looking at all of my beautiful plants.
Below you will find some gardening tips. Later we will be adding pictures of my currant garden & some items from the past, including newspaper articles on some of my wonderful garden plants.
**************************************************
Dad's pages will continue to be added to.
In Loving Memory.
(3/19/1917 - 2/26/2007)
**************************************************
LADYBUGS
 Attract Ladybugs... They're good for your garden
Luring Ladybugs Into Your
Garden:
Of all
the insects in the garden, the ladybug is probably the most
easily recognized. Ladybugs, (also called lady beetles or
ladybirds,) are a gardener's best friend. Not only do they
feed on insect pests, especially aphids, but their bright coloring
also brings cheer into the garden.
Attracting
them into your garden takes some planning but can help immensely with
your pest control. However, if you just don't have the space to
plant the types of plants that ladybugs like, releasing commercially
bought ladybugs can help you clean up infested plants while you work
to establish your own population.
Identification:
Adult lady beetles are usually oval or domed shaped, and
can range in color from red to orange. The number of black
markings can also range anywhere from no spots to 15 spots.
Some species are even solid black or black with a red spot (the
Twice Stabbed Lady Beetle).
The young, larval form of the ladybug
is often less recognized. They tend to resemble tiny, six
legged alligators, blue-black in colour with orange spots.
Often, gardeners unknowingly squish or spray the larval form of the
ladybug, not knowing what a benefit they are to the garden.
Both adults and larvae feed on many
different soft-bodied insects but aphids are their main food
source. One larva will eat about 400 aphids during its
development and a single adult can eat a whopping 5,000 aphids in
its lifetime. They will also eat other insects such as
mealybugs and spider mites as well as the eggs of the Colorado Potato
Beetle and European Corn Borer.
Life Cycle: Within a
year, there can be as many as 5 to 6 generations of ladybugs as the
average time for growth from egg to adult only takes about 3 to 4
weeks. In the spring, adults find food and then the females lay
anywhere from 50 to 300 eggs. The tiny eggs are yellow & oval
shaped and are usually found in clusters of 10 to 50, near aphid
colonies. The eggs take 3 to 5 days to hatch and the larvae
voraciously feed on aphids for 2 to 3 weeks before they grow into
adults.
In the fall, adults hibernate in plant
refuse and crevices. They often do this in groups where several
hundred adults will gather at the base of a tree, along a fencerow or
under a rock. They especially like areas where leaves protect
them from cold winter temperatures.
Attracting Ladybugs in the
Garden: Apart from aphids, ladybugs also require a source of
pollen for food and are attracted to specific types of plants.
The most popular ones have umbrella shaped flowers such as fennel,
dill, caraway, angelica, tansy, wild carrot & yarrow. Other
plants that also attract ladybugs include cosmos (especially the
white ones), coreopsis, and scented geraniums, and dandelions.
Apart from planting attractive plants
in the garden, you can also promote ladybug populations by cutting
back on spraying insecticides. Not only are ladybugs sensitive
to most synthetic insecticides, but if the majority of their food
source is gone, they won't lay their eggs in your garden. As
difficult as it may be, allowing aphids to live on certain plants is
necessary to ensure that there is enough food for ladybugs. In
addition, resist the urge to squish bugs & eggs in the garden, unless
you're certain that they are not beneficial.
Purchasing Ladybugs:
Sometimes, there just isn't enough room in the garden to
have ladybug-attracting plants. Purchasing ladybugs can help
a population become established.
Scientists have found that
indoor-reared ladybugs fail to find their own food when released
outside so the majority of commercially available ladybugs are
collected from the wild. Before releasing them into the garden,
here are a few tips to help ensure that they stay where you want
them:
1. Only release ladybugs after sun down or
before sun-up. Ladybugs navigate by the sun and in the evenings
& early mornings, they tend to stay put.
2. Pre-water the area where you are releasing
them. Not only will the ladybugs appreciate the drink,
moisture on the leaves helps the ladybugs to "stick" to plants.
3. In the warm months, it helps to chill the
ladybugs in the fridge before releasing them. Ladybugs tend to
crawl more than fly in colder temperatures and the overnight stay in
the fridge won't harm them in any way.
4. On severely infested plants like roses,
drape a floating row cover or thin sheet over the plant and release
the ladybugs underneath. Within a day, the ladybugs will have
found the aphids and will be happily munching away at them.
The Asian Ladybug:
If you are planning to buy ladybugs for your garden or
greenhouse, I encourage you to select the native ladybugs species,
Hippodamia convergens, rather than the Asian ladybug, Harmonia
axyridis. Although the Asian is very effective at controlling
aphids and is often the species of choice for commercial greenhouse
growers, it is the main cause for "ladybug infestations" inside
houses.
While the native ladybug is happy to
hibernate outdoors, the Asian species requires warmer temperatures
and often ends up becoming a pest to homeowners as it congregates in
large numbers inside. It also seems to be establishing fairly
large numbers in the wild and there is some concern it will begin
competing with the native species. Some suppliers of predatory
insects do sell both species but it's best to choose the native one
if you can.
**************************************************
ASPARAGUS
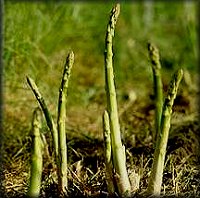 This
vegetable has attractive, feathery fern-like foliage that can grow up
to 3 feet tall. Time is required to prepare the asparagus bed,
but if done right the bed will last for years.
This
vegetable has attractive, feathery fern-like foliage that can grow up
to 3 feet tall. Time is required to prepare the asparagus bed,
but if done right the bed will last for years.
Planting: In the north,
plants should be set out in early spring. In the South, set
them out in the fall because it can be so hot in the summer that
the young plants may not survive. Asparagus does well in most
types of soil, but it should be well drained. Place plants 2
feet apart with 5 feet between rows. Once the bed is
established, which takes three seasons, 25-30 crowns will produce
enough asparagus for most families.
Dig a trench 12-18 inches deep and the
length of your row. Add 6-7 inches of aged manure or compost
or a little peat moss. Sprinkle on a dusting of balanced
fertilizer and add a couple of inches of soil from your garden.
Mix well.
With the mixture you have made, build up
mounds at the bottom of the trench about a foot apart. Set
each crown on top of a mound and drape the roots down the sides.
Growth will be slow if roots are placed flat.
Fill the trenches making sure the crowns
are at least four inches beneath the soil surface. The soil
level of the row should be a little below the rest of the garden.
When the shoots grow up, fill in the trench with a little more soil
to give the stalks good support.
First Year Care:
Place a thick mulch around the small spears after they come up to
keep the weeds down and to hold in moisture. Let the new plants
grow through the summer and fall without cutting shoots or ferns.
Let the tops die down in the late fall without interference.
Choosing Plants:
Begin with two-year-old roots. One-year-old plants will be
cheaper but these younger plants often don't survive transplanting,
and your first harvest will be delayed for a year. The very
patient gardener may want to try starting seeds in special beds and
transplant them to their permanent spot in the garden when they are
two years old.
To Store Asparagus:
Stand the spears upright in a jar with about an inch of water in the
bottom. Keep the jar in the refrigerator.
Second Year Care:
This spring and every spring you need to cut the old ferns that died
over the previous fall and winter and clear them out before the
plants begin to grow. Also remove any mulch that's left in
the bed. Fertilize and cultivate well between the rows.
Be careful of spreading roots. Mulch around the spears when
they are tall enough. Don't harvest this year.
Third Year Care: Repeat
the process of cutting back the ferns, removing the mulch and
fertilizing. Harvest some spears by cutting with a sharp knife
just below the soil when they are 6-8 inches tall. Cut only the
ones that are as thick as your finger and let the skinny ones grow
into ferns.
Each year
you will need to leave some spears to grow into ferns. After the last
harvest, pull all weeds and fertilize the bed. Mulch
heavily to prevent the growth of weeds.
**************************************************
BEANS
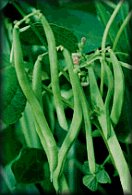 Types of Beans:
Beans are usually divided into three types.
Types of Beans:
Beans are usually divided into three types.
Green and Yellow Snap Beans:
These used to be called string beans, but the string has
been bred out of most varieties. They come in bush and pole
varieties. Pole beans will require some kind of support, and
will produce the heaviest yield.
Shell Beans: These
include lima beans, southern peas, and horticultural beans.
Dry Beans: Dry beans
come from plants that have completed their growth and produced hard,
dry seeds inside their pods. When mature, the beans are packed
with protein.
Planting time: Plant
mid-spring to late-summer. Be sure danger of frost has
passed.
Soil: Well
drained. Root system is shallow.
Sowing seeds: Sow
seeds directly into beds. Climbing beans should be 6 inches
apart in rows 3 feet apart. Dwarf varieties should be spaced
2 inches apart.
Fertilizer: Add lime if
the soil is acidic. Rich soil or soil to which compost has been
added will be fine until the beans begin to flower. At this
time, side dress with manure or additional compost.
Sun: Plant in full
sun.
Temperature: Beans
can't tolerate frost. They need warm soil.
Support: Climbing
varieties require trellises, poles, or other means of support at
least 8 feet tall.
Watering: You must
water in most areas because of the shallow root system. At a
minimum, beans should be watered after sowing, and when seedlings
appear and during flowering.
Maintenance: Hill
rows with soil during early growth to protect the plants from the
wind. Be careful when weeding the seedlings because the roots
are near the surface.
Harvesting: Dwarf
beans will mature in about 10 weeks and climbing beans will be ready
in 10-12 weeks. Frequent picking will result in
increased flowering and greater yields. Be careful when pulling
the pods off so you don't damage the vines. The pods are ready
to pick when they snap easily and seeds are not yet fully
developed. Avoid harvesting in very hot or very cold
weather.
Bean Diseases: Here
are a few tips tp help avoid disease.
1.
Stay out of the garden when plants are wet.
2.
Rotate the bean crop each year to avoid soil-borne diseases.
3.
Use mulch for walkways to keep rain from splashing soil and disease
spores on the plants.
4.
Never leave dead plant material in the garden, as this encourages
disease.
**************************************************
BEETS
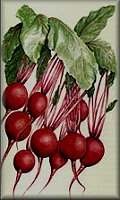 Beets
thrive in cool weather, and can be planted in spring and late
summer. Roots may become woody in very hot weather. They
can tolerate a light frost, but not scorching heat. Sow seeds
2 inches apart in square foot blocks about 1/2 inch deep. They
will germinate in about two weeks. Thin to 3 or 4 inches apart,
then mulch with clean straw. Beets can tolerate partial shade,
however full sun is preferred.
Beets
thrive in cool weather, and can be planted in spring and late
summer. Roots may become woody in very hot weather. They
can tolerate a light frost, but not scorching heat. Sow seeds
2 inches apart in square foot blocks about 1/2 inch deep. They
will germinate in about two weeks. Thin to 3 or 4 inches apart,
then mulch with clean straw. Beets can tolerate partial shade,
however full sun is preferred.
Preparing the Soil:
Till soil 6 to 8 inches deep. Work in plenty of fertilizer to
improve the soil. It is difficult if not impossible to grow
good beets in clay soil without a raised bed. Rake soil well
to remove stones and debris.
Beets need
an alkaline soil, and the addition of a pound of lime for each square
yard of bed will sweeten the soil.
Planting: Sow beets
all season long in subtropical climates; during spring and autumn in
warm regions, and spring through early autumn in colder areas.
Maintenance: Good
beets depend on a steady moisture supply. A light mulch around
young beets will help the soil retain the necessary moisture.
They do not tolerate weeds, but be careful not to damage the roots
when weeding.
Beets are
sensitive to boron deficiency, which causes blackspot, sickly growth,
and poor taste. Only small amounts are needed, and if you use
compost, the soil will be adequate. If you're in doubt,
sprinkle a little borax around the plant.
Beets are
seldom bothered by insects or disease.
Harvesting: Beets
mature in approximately 3-4 months, however tender young "baby
beets" are a real treat. They lose flavor and the centers become
woody as they get bigger.
**************************************************
BERRIES
 Berries
are almost the perfect home garden plant. They are easy to
grow, requiring little more than a patch of full sun and some
well-drained soil. Most have perennial roots with shoots that
are biennial. This means that the shoots (called "canes") grow
vegetatively in the first growing season, go through a dormant
season, then leaf out, flower, fruit, and die during the second
growing season.
Berries
are almost the perfect home garden plant. They are easy to
grow, requiring little more than a patch of full sun and some
well-drained soil. Most have perennial roots with shoots that
are biennial. This means that the shoots (called "canes") grow
vegetatively in the first growing season, go through a dormant
season, then leaf out, flower, fruit, and die during the second
growing season.
Raspberries
and blackberries are the two most common bramble crops. Red,
black, and purple raspberries are the three most commonly grown
raspberry types. Red raspberries have erect canes and are
propagated by suckers. Black raspberries have arched canes that
root at the tips. Purple raspberries are hybrids of red and
black varieties.
Planting: Unless
otherwise stated, these are the basic planting instructions
for berry bushes: Dig a hole twice the size of the root
ball and a proper depth that is level or slightly lower than the soil
surface. Add organic matter (peat moss or humus) to the soil
and mix thoroughly. The amount of organic matter should equal
1/2 the volume of the soil. Place the plant into the hole
making sure that the hole has the proper width and depth. Begin
to back fill the hole halfway. Make sure that the plant is
straight before too much soil is in the hole. Tamp the soil
around the root ball. Repeat the procedure of filling and
tamping until the hole has been filled. Give the plant a good
initial watering, then again every 3-5 days after planting. Top
dress with shredded bark (2" deep) and fertilizer (1/2 lb. per year
since planting, starting with the second season).
Raspberries
grow best in cool climates, and can tolerate a wide range of soil
types from sandy loam to clay. The most important requirement
for the berries is that the soil is deep so that the roots are not
restricted. Raspberries should not be planted in an area
following the cultivation of tomatoes, eggplant or
potatoes. Diseases that affect these plants may remain in the
soil and damage the berries. Plants can be grown in hills or in
rows. Red raspberry plants should be set 2 to 3 feet apart if
planted in rows. Before planting, cut the tops of the plants
back to six inches. Set the plants into the hole so they are 2
to 3 inches deeper than they were in the nursery. Water after
transplanting.
To get
maximum yields from raspberries, apply fertilizer every year in the
early spring just as new growth begins. Manure works well as
does a commercial 5-10-5 fertilizer. Apply this as a top
dressing at the rate of 8 ounces per plant, or spread in a wide band
no closer than about 6 inches from the crown around each hill.
Some red
raspberry varieties have long, slender canes that must be
tied. They can be staked or tied to a trellis. Set the
trellis posts at either end of your raspberry row and run wires
between them. Most red raspberry varieties are stout caned and
can be planted in hills without training them to stakes. The
wires will just support the boughs when laden with fruit.
Raspberry
canes are biennial; they grow the first year, fruit the second,
then die. Only the crown and the roots are perennial. Old
canes should be removed as soon as the fruit is harvested. New
canes grow from buds on the base of the old canes. Two new
shoots usually come up each year. In addition, suckers grow
directly from the roots of red raspberries. The new canes and
suckers should be thinned immediately after harvest.
Berries
should be picked in the morning after the dew has
evaporated. If picked in the afternoon, the berries will take
longer to cool down, which shortens their shelf life.
Blackberries and raspberries should be picked when they are
plump, sweet, fully colored and can be easily pulled off the
stem. Different varieties may produce berries at different
times, providing a longer harvesting period.
Summer
fruiting cultivars should have the old canes cut out as soon as the
fruit has been picked. Autumn fruiting cultivars should be cut
down to within a few inches of the ground in late February.
**************************************************
BROCCOLI
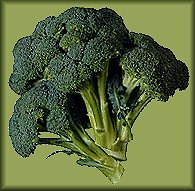 A head of
broccoli is a cluster of flower buds. When the head is young
its individual buds are packed very tightly. As long as the
buds stay tight, just let the head grow. Once the head begins
to loosen and spread out, they are about to bloom and the head should
be cut immediately, regardless of the size.
A head of
broccoli is a cluster of flower buds. When the head is young
its individual buds are packed very tightly. As long as the
buds stay tight, just let the head grow. Once the head begins
to loosen and spread out, they are about to bloom and the head should
be cut immediately, regardless of the size.
Once the
main head has been cut, many smaller heads, called side shoots, will
form on other parts of the plants. They may not be large, but
the number of shoots often makes up for the decreased size and they
are just as good.
Broccoli
can be grown anywhere except in the hottest and coldest climates,
but it does require cool weather to reach maturity. Ideal
temperatures are not more than 77 degrees during the day and not
less than 60 degrees at night.
Location: Plant in
a well drained, sunny location. Broccoli can be planted in
containers outdoors.
Cultivation:
Prepare the soil with manures and compost and provide extra nitrogen
supplement if the soil is sandy.
Planting: Sow seeds
1/2 inch deep into the soil. After thinning, plants should be
about 10 inches apart. Successive sowings should occur at one
month intervals. If you are starting seeds indoors, use 4 inch
peat pots and transplant when 4 leaves have appeared (6-8 weeks
after planting).
Watering: The plant
grows quickly, so keep soil moist by watering often, if
necessary. Plants requires less water as the heads begin to
mature.
Fertilizing: Manure,
especially poultry manure, is an excellent fertilizer for
broccoli. Weekly feedings with liquid seaweed fertilizer also
improves crops.
Harvesting: When
buds are large and firm but are not yet flowering, cut the large
central head leaving about 6 inches of stalk attached.
**************************************************
CABBAGE
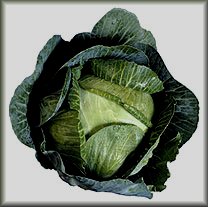 If the heads begin to crack, that means that the inside of the head is growing faster than the outside is. This is sometimes caused by over-fertilization. If it is allowed to continue to crack, the cabbage will go to seed. To stop this, give the whole plant a 1/2 turn to break off some of the roots. If this does not stop the cracking, give it another 1/4 turn a few days later.
Cabbage will grow in a wide range of climates. It will tolerate frost but not extreme heat that can cause the head to split.
Locate plants in a well drained, sunny location. Soil should be fertilized.
Cabbage grows quickly, so keep the soil well watered.
Planting: Sow seeds 1/4 inch deep and 3 inches apart in seed trays or flats. Transplants can be placed in the garden in the spring in cool zones and year round in other areas. Transplant seedlings when 4 inches tall with 4-5 leaves. Plant them about a foot apart. Harden off before transplanting by withholding water for a couple of days.
Watering: Keep the topsoil moist.
Fertilizing: Work in plenty of manure. Poultry manure is especially good.
Harvesting: Plants mature in 14-16 weeks. Pick when the head is firm. Remove it from the stem by cutting it. Leave the outer leaves on the stem.
**************************************************
CARROTS
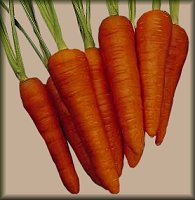 Preparing the Soil:
Carrots need a well-drained, stone free soil that has been
deeply worked. If the root meets an obstacle in the early
stages of growth, it will branch or may simply stop growing.
Carrots like full sun but will tolerate partial shade, especially
if the weather is very warm.
Preparing the Soil:
Carrots need a well-drained, stone free soil that has been
deeply worked. If the root meets an obstacle in the early
stages of growth, it will branch or may simply stop growing.
Carrots like full sun but will tolerate partial shade, especially
if the weather is very warm.
Carrots produce best in a raised
bed. Till the soil to a depth of at least 8 inches, adding
plenty of compost or well-rotted manure. Potassium promotes
solid, sweet carrots. Wood ashes contain highly soluble
potassium, and reaches the plants quickly. As you prepare
the soil, work wood ashes into the top 4 inches of the soil, where
feeder roots thrive. Add lime if the soil tends to be acid.
Planting: Carrots
are cool-weather vegetables, so start sowing about two weeks before
the last expected frost in your area. Make successive plantings
every three weeks until the hottest part of the summer. Furrows
should be about 3/4 inch deep and 4 inches apart.
Place a 1/2 inch layer of peat moss in
the bottom of each furrow, sow the seeds sparingly on top, then cover
with about 1/4 inch of soil. Seeds must be kept moist to
germinate. Mulching with straw will help hold the moisture, and
will also make it easier to water without disturbing the seeds.
When sowing seeds, try to space them 1/2
inch apart. The tiny seeds make spacing difficult, but it will
be easier to thin without disturbing the plants you plan to leave if
there is a little space between them. You may want to try
mixing radish seeds with the carrot seeds. The carrot seeds are
slow to germinate, and the radishes, which germinate and grow very
quickly, will mark the row until the carrots come up.
A second crop of carrots can be planted
in late summer or early fall in most areas. If a hard freeze
threatens, protect your fall crop with a heavy mulch.
Maintenance: The
first few weeks after sowing, determine the size of your crop.
Carrots can't tolerate a deep planting in a dry bed, so the trick is
to offer them a shallow sowing with even moisture. The
seedlings grow slowly and can't compete with weeds. Hand
weeding is recommended until the carrots are 2 inches tall.
Thin the carrots 3 inches apart, and then mulch with clean straw
and compost to keep the weeds at bay.
Mulching also helps the soil retain
moisture and prevents "green shoulder," which is caused by exposing
the crowns of the carrots to the sun, making the roots bitter.
If the tops of your carrot roots start to turn green, pull the soil
up around them. Overwatering your carrots can cause the roots
to crack.
Common Problems: The
insect to watch for is the rust fly. Carrots planted after the
first week of June often escape the first generation of rust flies,
and those harvested before September usually escape the second
generation. Interplanting onions or garlic in the carrot beds
will also ward off the villainous flies.
Compost and wood ashes will also scare
off not only rust flies but carrot weevils, wireworms, and other
carrot pests. Probably the best organic way to get rid of
pests is to soak the bed once a week with a thin mixture of wood
ashes and water using a watering can.
Most carrot pests and diseases are
soil-borne and can be controlled by crop rotation.
Harvesting and Storage:
Most carrots can be harvested in less than three
months. The largest carrots will have the darkest, greenest
tops, but don't leave the roots in the ground too long or they will
be tough. Most are at their prime when about an inch in
diameter at the crown.
When harvesting, drench the bed with
water first, making the carrots easier to pull. When you find
a carrot big enough, grasp the greens at the crown and tug gently
with a twisting motion. If the greens snap off, carefully lift
the roots with a spading fork. Use damaged roots right away
and store unblemished ones.
Thick cored carrots store the
best. There are three ways to store fresh carrots:
1.
Leave them in the ground under a heavy mulch.
2.
Store them in a root cellar or underground barrel.
3.
Keep them in the crisper bin of the refrigerator.
If the temperature seldom drops below
20 degrees F, you can leave carrots in the ground all winter. A
thick mulch will help protect them during hard freezes.
**************************************************
CAULIFLOWER
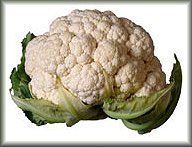 Harvest cauliflower when the heads are about 6 to 8 inches across. As with broccoli, be sure you cut the head before the buds begin to loosen. The plant can be removed after the head is cut.
Cauliflower does not like hot weather so set your plants out as early as possible. Heads that mature in hot weather will have a bitter taste.
Location: Heads will discolor unless the plants are protected from full sun and frost.
Cultivation: Garden beds should be rich in manure and other organic matter. Supplemental feedings will probably be necessary. The white of the head is preserved by *blanching it* or protecting it from sunlight. While the head is still small, tie the large leaves together over the head. These will be replaced as the head grows.
Planting: Sow seeds 1/4 inch deep and 2 inches apart in seed trays or flats. Seedlings take about 6 weeks to appear and are ready for transplanting when they are around 4-6 inches high. Transplant only in cool weather.
Watering: Water well, but avoid watering directly over the head to prevent damage. Head may need some protection during heavy rainfall.
Fertilizing: Work plenty of manure into the soil. Poultry manure is especially good.
Harvesting: Plants mature in 4-5 months. Remove the heads when they are about 8 inches wide by cutting. If left too long, they will discolor and lose their crisp firmness. Leaves can also be used as a vegetable.
*Blanching Cauliflower*
Blanching cauliflower doesn't make it taste any better, but the snow-white curds of a blanched head are more appetizing than the green, yellow or brown curds you will get from an unblanched head.
The heads are ready to blanch when they are about two inches across. Choose a warm, sunny afternoon to work with your plants, and make sure that they are dry before you begin, because working with wet plants can make them disease and rot. The only supplies you will need are some soft twine or rubber bands.
To blanch the head, pull some of the leaves from the sides of the plant up over the head and secure them with the twine or rubber bands. Cover the head and completely shade it from light and protect it from moisture, but leave openings for air to circulate. Self-blanching cauliflower types such as "Fremont" or "Ravella" have leaves that naturally curl up over the head.
Once you start blanching, never water your plants from the top. Soak the roots, but leave the head and leaves as dry as possible. Unwrap the heads after a hard rain and let them dry out. Check them for insects from time to time. They will grow quickly at this stage, and will probably be ready for harvest in a week or two.
**************************************************
CORN
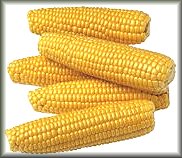 Corn Growing: Corn
is a warm-weather vegetable that grows best during the long, sunny
days of summer. It needs full sun and windbreaks in areas where
strong winds are a problem. The rule of thumb for seeding corn
is to plant it two weeks before the last expected frost date.
Corn is pollinated by the fall of pollen from male flowers (tassels)
at the top of the stem onto female flowers (silks) lower down.
When corn is pollinating, water at ground level so as not to disturb
the process. To extend your harvest a few weeks, stagger your
corn plantings. This also prevents accidental cross-pollination
of certain varieties. If you plan to plant different varieties
of corn, allow at least 100 feet between them. Otherwise they
will cross pollinate each other, and you will only get one
variety. This is especially important if you will be planting
popcorn, as it usually dominates.
Corn Growing: Corn
is a warm-weather vegetable that grows best during the long, sunny
days of summer. It needs full sun and windbreaks in areas where
strong winds are a problem. The rule of thumb for seeding corn
is to plant it two weeks before the last expected frost date.
Corn is pollinated by the fall of pollen from male flowers (tassels)
at the top of the stem onto female flowers (silks) lower down.
When corn is pollinating, water at ground level so as not to disturb
the process. To extend your harvest a few weeks, stagger your
corn plantings. This also prevents accidental cross-pollination
of certain varieties. If you plan to plant different varieties
of corn, allow at least 100 feet between them. Otherwise they
will cross pollinate each other, and you will only get one
variety. This is especially important if you will be planting
popcorn, as it usually dominates.
Time your plantings by checking the days
to maturity and counting back from the date you want to begin
harvesting. One thing to remember is that the harvest time may
vary slightly if the weather is very cool or very warm during the
growing season. Timing your corn plantings is especially
helpful if you're planning a midsummer vacation away from home.
You needn't miss a single, delicious ear if you plan it right.
Soil and Site: Corn
likes rich soil with good drainage. Ideal soil for corn is
sand that stays moist, without being too wet. The fastest way
to improve less-than-perfect soil is to add plenty of organic matter
(leaves, compost, grass clippings and crop residues). If
possible, work in a 1-inch layer of manure the preceding fall.
Alternatively, you can grow a green manure crop, such as buckwheat,
oats, clover, rye, winter wheat, or vetch that will be plowed under
in the spring. If your soil is too sandy, organic matter will
help it retain nutrients and moisture, which are vital to corn.
If you have heavy clay soil, organic matter will wedge between the
soil's tightly compacted particles to loosen it and improve its
drainage.
As you're planning your garden, whether
on paper or in your head, arrange the corn so it will be in at least
four side-by-side rows to ensure good pollination. Be sure it
gets full sun, away from trees that might shade it. Most corn
varieties are tall and can shade shorter crops, so plant corn on the
north or east side of the garden.
If you've grown corn before in the same
garden, change the place where you plant it, or rotate it, every
year. This can be tricky if you don't have lots of garden
space, but when you rotate corn, you prevent disease and pest
problems from recurring. You also keep your garden's natural
fertility in balance by moving heavy feeders, like corn, around.
If your garden is too small for yearly rotation, rotate it at least
every second or third season. If you run into a bad insect or
disease problem one year, rotation the following season is a must.
Fertilizer -- A Fish Story?
Many gardeners have heard that colonists learned from the
Indians to plant each corn kernel on top of a dead fish. This
is no "fish story". Decaying fish contain nitrogen, which corn
needs for good growth. The Indians and colonists may not have
known why it worked, but they liked the results, so continued to do
it.
Because it needs a steady supply of
nitrogen throughout the growing season, corn is called a "heavy
feeder." It's logical that a plant that can grow over six feet
tall and produce hundreds of seeds needs lots of food. It's not
so much the amount of food that matters as a steady diet while corn
is growing. In fact, at planting time, corn needs about the
same amount of fertilizer as most other garden vegetables.
During the growing season, however, you give corn additional feedings
by side-dressing the crop. Fish emulsion and manure tea are
good choices.
Going along with the notion behind the
dead fish of early American times, you can use an organic fertilizer
such as well-rotted compost, aged or dehydrated animal manures or
concentrated animal or plant extracts like bloodmeal or alfalfa
meal. These materials may be available at little or no cost to
gardeners in some areas. In other areas they may be prepackaged
and sold at garden stores and the prices can be high. An
advantage of these fertilizers is their ability to condition the soil
as well as to feed plants. They also provide nutrients over an
extended period of time, which helps corn.
How to Have the Earliest Corn
If you live in the North, it's not too hard to grow corn
that's "knee high by the Fourth of July," and if you live farther
south you can easily beat that date. Choose an early variety
like 'Earlivee', 'Early Sunglow' or 'Quickie'. Plan to plant
four to six weeks before the last frost date in your area.
Planting Early:
Plant the seed about 1 1/2 to 2 inches deep. If you
want to, you can cover the rows with a plastic tunnel for extra heat
or with chicken wire to protect the seeds from birds.
When the seedlings are 8 to 10 inches
high, give them their first dose of fertilizer. Side-dress
with a balanced fertilizer and then water. Side-dress again
when the plants are knee-high, and give a third nutrient boost when
they tassel. Soon afterward you'll have the first local
corn.
Mulch: Some
gardeners mulch their corn to prevent weeds and to keep the soil
moist. Although mulching can be beneficial in hot, dry
climates, keep in mind that you'll need quite a load of mulch
material - hay, straw, leaves, peat moss, etc. - to take care of a
good stand of corn. As long as you give corn a steady supply
of food and water, it really doesn't require much other care.
Thinning: If you
plant corn in hills or plant the rows too thickly, you'll have to
thin out some plants to make sure the others have enough room to
grow. Thin when the seedlings are about four inches tall.
The best time to thin is after a rain
when the plants have dried but the soil is still moist. The
plants pull easily from the soil without disturbing neighboring
seedlings.
To thin, just pull up enough plants so
that those remaining in the row or hill will be 10 inches
apart. If you crowd your corn a bit - about 8 inches
apart - don't worry, it should do fine; but if you're just getting
the hang of raising corn, give your plants more room.
Planting Methods:
Once the seedbed is well worked and fertilized, you're
ready to plant. There are two traditional ways to plant corn:
three to five seeds grouped together in small circles, or "hills" or
spaced evenly down straight rows, one behind the other.
Weed Control: Weed
your corn every few weeks, starting before you even plant a
seed. Work the soil several times before planting. This
not only conditions the soil, it stirs up and kills tiny weed seeds
lurking near the surface. It also buries some seeds so deeply
that they never get a chance to sprout.
Once the corn is planted, scratch the
surface of the planting bed every week or so with a weeding
rake. When the corn is tall enough to be hilled, you'll
automatically get rid of weeds by covering them with soil as you
hill.
Hilling: Hilling is pulling
up soil to mound it around the base of a plant. When you hill
a young corn plant, the added soil around its stem helps support it
as it grows taller. This protects it from being blown over in
a strong wind. To really anchor plants, it's a good idea to
hill corn every two to three weeks until the plants start to
tassel.
Hilling also covers and smothers any
weeds around the base of your corn plants. You might say
you're creating a "soil mulch" around your plants. If dryness
is a problem, extra soil helps the corn roots retain moisture.
Watering: During a dry
season, watering is essential both when the corn is tasseling and when
the kernels are forming. At this time, the plant is devoting all
its energy to seed production, holding nothing in reserve for a dry
spell. The plants are relatively tall and exposed to the wind and
drying heat of summer, so they often "transpire" or give off moisture
faster than their roots can take it up.
During its growing season, corn needs at
least an inch of water per week. If it has to go through a dry
stretch, it may not produce well. If your garden receives less
than an inch of rain in a week, water.
When you water, water thoroughly.
Try to saturate the ground to a depth of about 4 inches.
Surface dampness will only encourage shallow roots. (Sandy soil
absorbs water faster than clay.) One sign of too little water
is if the corn leaves are curling or rolling. If you want
healthy, sweet, well-filled ears, pay close attention to the weather
at the tail end of the season and water if your corn needs it.
Harvesting: Sweet
corn should be harvested when its ears are completely filled out and
a pierced kernel shows a milky white liquid. You can also tell
by feeling the end of an ear. If it's rounded or blunt rather
than pointed, the ears are ready. The silks also dry up when
the ears are almost ready to be picked. The prime time for
corn to be harvested comes 12-14 weeks after planting and lasts only
a few days, so check repeatedly to see if the corn is ready.
If you are too early, the juice will be
watery. Later, the kernels turn doughy inside as moisture
recedes and sugar turns to starch. Here are some other signs of
readiness:
Dark green
husks.
Brown,
but not brittle, silks.
Well
filled ears.
Sweetness
is the key, so it helps to understand what makes corn sweet and why
timing is so important in your harvest. The plant manufactures
natural sugars when the kernels are filling out. These kernels
are seeds that each contain a natural food-storage compartment as
well as the corn embryo. A seed can't store sugars, but it can
live on stored starches throughout the winter months and in its
early stages of growth the following season. As soon as the
kernels are full of sugar, the plant begins to convert it into
starch. For best flavor, harvest the corn before this change
can take place.
The
sweetness of corn depends on the variety, temperature and amount of
sunlight during the day when the ears are forming. The plant
makes the most sugar on cool, sunny days. If the temperature
is too hot, the sugar-making process is slowed. That's why the
long, crisp, sunny days of early fall produce the sweetest corn.
To harvest
sweet corn, grab an ear and twist it down and off the stalk.
POPCORN
 Popcorn Pointers: The
only way that growing popcorn differs from growing sweet corn is
at harvest-time, and popcorn is actually easier to harvest because
you don't have to catch it at the peak of sweetness. Leave
popcorn in the garden until the stalks and husks are brown and dry,
then twist and snap each ear from the stalk. Do this before
the frost hits. To prepare popcorn for indoor curing,
carefully strip away the dried husk from each ear. The kernels
will be partially dried or "cured," a necessity for long-term
storage.
Popcorn Pointers: The
only way that growing popcorn differs from growing sweet corn is
at harvest-time, and popcorn is actually easier to harvest because
you don't have to catch it at the peak of sweetness. Leave
popcorn in the garden until the stalks and husks are brown and dry,
then twist and snap each ear from the stalk. Do this before
the frost hits. To prepare popcorn for indoor curing,
carefully strip away the dried husk from each ear. The kernels
will be partially dried or "cured," a necessity for long-term
storage.
Besides drying on the stalks, popcorn
requires another four to six weeks of thorough drying in a warm,
well-ventilated place. Corn can't pop unless there's the right
amount of moisture inside the kernel. When it's heated, the
moisture turns to steam, which causes the kernel to burst.
Place the ears in mesh bags or spread
them out in an area where they'll have warm air circulating around
them. You can also hang mesh bags full of popcorn ears in your
garage for about four weeks. After curing, hang the bags of
corn from the rafters of your root cellar. The corn can keep
for years in the cool, dry, dark conditions there.
After a month of curing, the kernels
can be taken off the ears and stored in airtight jars. Whether
you're removing the kernels before storage or just before popping,
there's no real trick to it. Simply grasp the ear firmly in
both hands and twist until the kernels drop out. Once started,
the kernels drop off with very little pressure. However, beware
of the sharply pointed kernels if you're using your bare hands.
After two or three ears, you may have a few nicks and scratches.
If you want to remove the kernels from a lot of ears, it might be a
good idea to wear gloves.
Popcorn doesn't take much garden space
for a sizable harvest. Each ear is loaded with tiny kernels
come harvest-time, and three or four five-foot-long rows should be
plenty. Many popcorn varieties produce one or two ears per
plant, so you may have enough by growing just five or six plants.
Pop homegrown popcorn just as you would
store-bought. Heat a few tablespoons of oil in a deep pot.
Sprinkle in enough kernels to coat the bottom and cover the pot.
As soon as you hear the first kernel pop, shake the covered pot
vigorously while the rest pop. When the popping stops, remove
the pot from the heat and take off the lid to let the steam
escape. The popcorn is ready. Enjoy it plain, or add your
favorite topping.
**************************************************
GARLIC
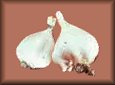 The bulbs
you buy in the grocery store will produce a good crop of
garlic. Since the plants will do most of their growing in
cool weather, it's a good idea to plant them in late summer or early
fall and to mulch the plants over in winter.
The bulbs
you buy in the grocery store will produce a good crop of
garlic. Since the plants will do most of their growing in
cool weather, it's a good idea to plant them in late summer or early
fall and to mulch the plants over in winter.
Planting and Maintenance:
Break each bulb into individual cloves, and plant the
cloves 3 to 4 inches apart, with the pointed end up. Give them
two or three sidedressings with manure or fertilizer during the
season. The soil around them should be kept loose and moist.
Harvesting: Pull up
the bulbs when the tops fall over and die. Let them dry in the
sun for a few days, then braid the tops together or place them in a
net bag. Hanging them in an airy location will help prevent
rot. Peeled garlic cloves may be stored in a jar of oil.
The garlic retains it's flavor and the oil will add flavor to salad
dressings.
Insects and Disease:
Insects:
Thripes are tiny insects that
feed on leaves that cause white, blotchy areas. The plants
weaken and the yield is reduced. Keep weeds out of the garden
to eliminate insect pests. A blast of cold water will remove
thripes from plants. Soap sprays may be also be effective.
Onion Maggots are the offspring of
a small fly that lays eggs near the base of the plant or on the bulb
itself. The maggots kill the plant by burrowing into the stem
and bulb. Pull up and destroy any plants before the maggots
mature into flies.
Disease:
Neck Rot is the most common
problem. It strikes just after harvest or while the bulbs are
in storage. Drying the bulbs at warm temperatures with good
ventilation and storing in a cool, airy spot will help prevent the
disease.
Garlic as a Companion Plant:
Garlic helps deter Japanese beetles, and it makes a great
companion for roses and raspberries.
Medicinal Uses:
Garlic has been used throughout the ages to ward off disease, and
has saved many lives in epidemics of infectious diseases. It
is antibacterial and gives protection against colds and the
flu. Garlic improves circulation and lowers blood
pressure. It was proven in controlled clinical studies to
reduce cholesterol levels. Further studies indicate that garlic
may have a positive role in the prevention of coronary heart disease,
thrombosis and arteriosclerosis. It may even offer some degree
of protection against cancer.
**************************************************
Leaf Crop ABC's
LETTUCE, SPINACH & GREENS
 Most
greens crops thrive in cool spring and fall weather (50*F to
60*F). Just compare the crisp, flavorful lettuce leaves
harvested in spring with the often bitter leaves of a summer cutting
and you'll agree. A few greens can handle summer heat, but most
of them prefer the cooler temperatures of spring and fall.
Most
greens crops thrive in cool spring and fall weather (50*F to
60*F). Just compare the crisp, flavorful lettuce leaves
harvested in spring with the often bitter leaves of a summer cutting
and you'll agree. A few greens can handle summer heat, but most
of them prefer the cooler temperatures of spring and fall.
A steady
flow of moisture and nutrients is important for good greens.
Leafy crops need plenty of nitrogen,
too. That's the key element in the good growth of leaves and it
influences the crispness and quality of leafy crops, as well.
The one thing most greens can't take is
a lot of heat. Spinach, for example, will quickly develop a
seedstalk and start to stretch upward when it gets too
warm. This is known as going to seed. When that happens,
spinach leaves begin to lose some of their flavor. A long hot
spell can spoil heads of iceberg-type lettuce, too. The heat
loosens the leaves of the head, and they get soft and sometimes
bitter. If you can shade some of these crops as hot weather
approaches, you can often keep the harvest going a few weeks
longer.
LETTUCE
Some
people may think lettuce is lettuce. Not so! There's a
wonderful assortment. Each has a distinct flavor, texture and
color, so you can have remarkably different salads just by varying
the lettuces you use. Here's a rundown of what you can expect
in the lettuce department:
Head Lettuce: Head,
or crisphead lettuces produce heads of tightly wrapped crisp
leaves. 'Great Lakes', 'Iceberg' and 'Ithaca' are good choices
for home gardeners. Those in the South may want to try
varieties better adapted to hot weather, such as 'Summertime' and
'Continuity'. 'Tom Thumb' is a good miniature iceberg type,
growing only to the size of a tennis ball.
Butterhead or loosehead plants form a
head, but the leaves don't wrap themselves tightly
together. 'Buttercrunch' is a good variety for home
gardeners. Its taste and crispness are terrific. The
leaves are crunchier than leaf lettuce. The outer leaves of the
head are dark green, and the inner leaves are
lighter-colored. 'Dark Green Boston' and 'Bibb' are two other
tasty and popular loosehead varieties. You can harvest some
loosehead plants before they form heads for an early harvest of
delicious leaves. A second crop will follow. To harvest,
simply take a knife and cut the entire plant off about one inch above
the ground.
Leaf Lettuce: Leaf
lettuce doesn't form a head at all - it grows up and out. It's
very easy to plant and will grow anywhere, almost anytime. Make
regular plantings every few weeks over the entire season, starting as
soon as you can work the soil in the spring. That way you
always have lettuce that is young and fresh. Harvest at the
peak of freshness and taste. Harvest leaf lettuces by picking
off the large outer leaves or cutting the plant off an inch above the
ground and letting it grow back. 'Black-Seeded Simpson' is an
old favorite, and one of the earliest leaf lettuces you can
grow. 'Simpson Elite' is a new improved version. 'Oak
Leaf' has thin, tender leaves and takes heat well; 'Red Salad
Bowl' is a red-tinged oakleaf. 'Green Ice' has crinkly leaves
and is one of the slowest to go to seed. Be sure to include
some 'Red Sails' or 'Four Seasons' lettuce, too. They add great
color and taste to a salad, and look beautiful in the garden.
Romaine Lettuce:
Plant seeds very early like other varieties, but plant them
a little thicker because Romaine lettuce doesn't germinate as well as
other kinds of lettuce. The plants produce a tall head - 10
inches or more - of dark green leaves that close up firmly. The
tight, inner leaves are very tasty in tossed salads because they
often have a pleasant, mild taste. Romaine lettuce takes 70 to
80 days to form a full-grown head. You can harvest it earlier,
of course, just like loosehead lettuce. Cut it before it forms
a head, and it will come back to give you an additional
harvest. 'Paris Island' cos is a vigorous, disease-resistant
variety with dark green leaves; 'Rosalita' is a dark red-leafed
cos with good heat tolerance. 'Rouge d'Hiver' is an
early-maturing European red heirloom. 'Winter Density' will
withstand a light frost.
Planning Your Greens Garden
When you
think about greens to grow you've got a big group of plants
to consider, as well as different varieties of some salad
crops.
Planning Tips:
* Plant some lettuce or spinach between your corn rows, or on the
shady side of a row of tomatoes.
* Try multi-planting. Plant
lettuce, carrots and onions in the same wide row (15 to 16 inches
across). Harvest the lettuce when young, leaving expansion
room for carrots and onions. You can mix and match with other
crops, too, including beets and spinach.
Mulching: A thick,
organic mulch (straw, leaves, grass clippings, hay, etc.) is a must
if you're growing head lettuce down South in the spring. It
will help retain moisture and keep the soil cool as warm spring
weather arrives. It's good in Northern gardens, too, where
spring heat or quick-draining soils could hurt the crop.
Cultivation: Be sure
not to kill or hoe around your head lettuce plants deeper than one
inch - their roots are shallow.
Booster Shot of Fertilizer:
Lettuce has a limited root system that can't go deep in the
soil for nutrients. Sometimes an application of extra
fertilizer along the way - known as sidedressing - can
help. Make a light application of fertilizer every three to
four weeks.
Spinach
Spinach
must have at least 6 weeks of cool weather from seeding to
harvest. Plant seeds outdoors 4 to 6 weeks before your last
spring frost date, and again 4 to 6 weeks before the first fall frost
date.
Preparation: Mix
compost, manure, and/or fertilizer into each row or plot before
planting.
Planting: Sow seeds
1/2 inch deep, about 12 seeds per foot of row, or sprinkle them over
a wide row or bed.
Care: When seedlings
are 1 inch tall, thin to stand 4 inches apart. Water every few
days during dry spells; mulch spinach planted in rows to retain soil
moisture.
Harvesting: To
harvest early, cut individual leaves as soon as they are big enough
to eat. When the weather warms up, cut the whole plant close to
the ground, below the lowest leaf. Harvest again after a few
new leaves reappear. Repeat as long as possible.
Sprinkle
in a few radish seeds. After you've broadcast the main
crop, sprinkle some radish seeds down the row. They'll come up
quickly and mark the row. Use about five percent as much radish
seed as the main seed. You can either pull up the radishes
while they're small or harvest them after you pick your crop of
greens.
Watering Greens Crops:
You can't beat greens that are crisp and
succulent. One of the most important things for highest-quality
greens is a steady supply of moisture.
Greens thrive in moist, but not wet,
soil. They require about an inch of rain or irrigation water
per week, and perhaps a little more for summer greens in hot
weather.
If the water supply drops, greens will
probably be the first crops in the garden to show signs of
drought. That's because many of them - especially
lettuce - have limited root systems; and because their large green
leaves give off quite a lot of moisture. Sometimes on a hot,
sunny afternoon many garden plants appear wilted. That's
normal; usually they'll recover by next morning. If they don't,
it's time to water.
Watering Tips:
* Irrigate early in the day to cut down
on evaporation losses and to make your water go further. This
also gives the plants plenty of time to dry out during the
day. (Wet foliage overnight allows disease organisms to spread
rapidly among plants.)
* Soak the soil thoroughly enough that
you don't have to come back and water again the following
day. Try to moisten the soil to a depth of five or six inches,
at least.
* If the soil is dry at planting time,
water as gently as you can after planting, so you don't wash out any
seeds. Be sure to keep the seedbed moist until the plants come
up.
**************************************************
ONIONS
 Onions
should be planted well before the last spring frost date.
During the first phase of growth, the onion will be producing lush
green tops. At some point, the tops will quit growing, and the
bulbs will begin to mature.
Onions
should be planted well before the last spring frost date.
During the first phase of growth, the onion will be producing lush
green tops. At some point, the tops will quit growing, and the
bulbs will begin to mature.
Onion
seeds will take 100 to 120 days to mature. Sets, which are
small bulbs started the previous year, will mature three or more
weeks earlier. Onion plants, which are usually purchased in
bundles, will mature at about the same time as the sets. You
will find the widest range of varieties in seeds.
Preparing the Soil:
Onions prefer a well worked soil. The fall before
you plant, dig in compost or manure at the rate of about 20 pounds
per square yard.
In order to give the onions a long
period of growth, seeds can be planted in late August in areas where
winters are not too severe. In colder areas, seeds can be
started indoors. If your season is long enough to give 100 to
120 days for the onions to grow and mature, you can sow seeds
outdoors a month before the final spring frost.
Allow 1/2 ounce of seed for every 100
feet of row to be sown. Place two seeds per inch and cover with
1/4 to 1 inch of soil. Thin once when the seedlings are still
very small and can be transplanted into another row, then again when
they are large enough to be used as green onions. Mature plants
should be three to four inches apart.
Plant Maintenance:
Keep the plants free from weeds, as onions are less
tolerant of crowding than most other vegetables.
Water regularly until the tops start to
yellow, then withhold water and pull the soil back so that the top
two thirds of the bulb shows.
Cultivation should be very shallow,
because the roots are close to the surface.
Harvesting: When the
tops are quite dry, pull the bulbs and let them dry in the sun until
all the dirt on them is dry. Onions can now be prepared for
storage. The long tops can be braided together so that the
onions can be hung in bunches, or they can be hung in net bags or
old stockings. Continue the curing process for several weeks by
keeping them hung in an area where air can circulate freely.
Afterwards, move them into a cool, dry, and preferably dark area for
storage. Use thick necked onions first, since they will not
keep well.
Bunching Onions:
Bunching onions will not form a bulb, but they make the
tastiest green onions. They are a perennial, and should be
planted where you will not run a tiller or cultivator.
Bunching onions are usually planted from
seed, and you can begin harvesting when they are about pencil
size. They will not require mulch and will keep you in onions
year round. When your plants begin to produce flowers, leave
them alone. They will soon reseed themselves.
Onion Problems:
Insects:
Thripes are tiny insects that
feed on leaves that cause white, blotchy areas. The plants
weaken and the yield is reduced. Keep weeds out of the garden
to eliminate insect pests. A blast of cold water will remove
thripes from plants. Soap sprays may be also be effective.
Onion Maggots are the offspring of
a small fly that lays eggs near the base of the plant or on the bulb
itself. The maggots kill the plant by burrowing into the stem
and bulb. Pull up and destroy any plants before the maggots
mature into flies.
Disease:
Neck Rot is the most common
problem. It strikes just after harvest or while the bulbs are
in storage. Drying the bulbs at warm temperatures with good
ventilation and storing in a cool, airy spot will help prevent the
disease.
**************************************************
PEAS
 Planting: Peas
should be planted in early spring, well before the last frost.
For an extended harvest, plant early, midseason, and late
varieties. Successive plantings of the same varieties tend to
catch up with each other, resulting in one big harvest.
Planting: Peas
should be planted in early spring, well before the last frost.
For an extended harvest, plant early, midseason, and late
varieties. Successive plantings of the same varieties tend to
catch up with each other, resulting in one big harvest.
It's a good idea to add "inoculant" to
soil or seeds before they are sown. This black powder is
available anywhere seeds are sold. It is not a chemical
additive but a naturally occurring bacterial powder that aids peas'
natural ability to "fix" nitrogen in the soil by forming "peanuts" of
nitrogen on their roots. In addition to helping plants actually
enrich the soil in your garden as they grow and thrive, this
inoculant also boosts the health of vines and the yield.
Climate: Peas like
cool weather, but early plantings of dwarf varieties such as Little
Marvel, Progress No. 9 or Wando will do well in warm climates.
Plant in wide rows so the peas will shade the ground and each
other.
Maintenance: If you
have planted your peas in wide rows, they will shade out any weeds
that may try to come up. They will also help support each
other, so that with dwarf varieties, no other support will be
needed. In Southern gardens, wide rows will also help keep the
soil cool and moist.
Peas are
legumes, and don't need much fertilizer, especially nitrogen.
Good soil that has been enriched with compost is all they need.
Peas need
adequate but not excessive water at soil level. Avoid watering
over the tops of mature leaves and flowers.
Harvesting: Pick
when the pods are full, firm, shining and bright green in color.
The sugar content will be high at this time. Frequent
harvesting from the bottom of the plant prolongs the harvest.
Be careful when pulling the pods so that the vine is not damaged.
Crop Rotation: Crop
rotation is a preventative measure which will stop the growth of
diseases affecting the plant. After harvesting, remove all
vines and burn them. They usually contain a variety of
diseases and are not suitable for composting. Plant peas in a
different section of the garden next year.
Companions: Good
companions for peas include bush beans, pole beans, carrots, corn,
cucumber, radish and turnips. Don't plant near onions.
**************************************************
PEPPERS
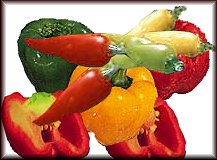 Peppers
are fast becoming one of the most popular of all vegetables to grow,
second only to tomatoes. There are hundreds of varieties
available especially if you grow them from seed. They come in
all shapes and colors, and range from the sweetest to downright
fiery.
Peppers
are fast becoming one of the most popular of all vegetables to grow,
second only to tomatoes. There are hundreds of varieties
available especially if you grow them from seed. They come in
all shapes and colors, and range from the sweetest to downright
fiery.
Often,
gardeners get addicted to growing peppers by chance. They buy a
variety at the local nursery for fun and to experiment. It
turned out to be such a success, that the next year they plant
three.
There are
almost as many varieties as there are of tomatoes! They come
in various shapes and sizes from small tapered or ball shaped ones to
long cones and big round bells. Thick fleshed ones are best for
roasting and cooking, while the thinner ones are great for eating
raw. And some of them are HOT!
Seeds and Seedlings:
Only the most common types - banana and bell types are
usually available as started seedlings for transplanting into the
garden. For small gardens, these are the best way to go.
Peppers cannot be planted out until the
outdoor soil and night temperatures remain above 65
degrees. Planting out too early in cold and wet conditions will
stunt them and harm fruit production. But remember, they must
be hardened off just like your tomatoes before planting out.
Pepper Pointers:
Peppers, especially hot pepper plants with their usually
small and colorful fruits, are ideal for spot planting around a
garden. When growing peppers in beds, avoid planting the
peppers where other members of the nightshade family have been
previously planted as they are subject to similar diseases. To
prevent cross-pollination, hot pepper plants should not be planted
near sweet or bell pepper plants.
When buying pepper plants choose those
that are sturdy with deep green leaves and without fruit or
blossoms.
Choose a location in your garden, patio
or home that receives morning sun - and at least 6 hours of sun
daily.
While full sun and heat are good for
peppers, too much can damage the fruit. Protect them from
intense afternoon sun with taller plants (or beans on a trellis), by
planting them in a block no more than 1½ feet apart.
Transplant pepper plants to garden beds
two to three weeks after the last frost and when the soil temperature
is at least 65 °F (18 °C).
When transferring pepper plants to a
garden bed or container, do it in the evening or on a cloudy day to
reduce the chance of sunscald.
Keep the soil moist, not soggy, to
encourage root development and prevent blossom wilting and
bitter-tasting peppers. Use a mulch, such as straw, grass
clippings or plastic mulch, to keep moisture in and protect roots.
Ensure that the soil drains well, so
that the roots aren't sitting in water. Raised beds are helpful
in poor-draining garden soil.
Soil Preparation:
Peppers enjoy soil that contains plenty of organic matter,
supplemented with a balanced fertilizer or better yet, one with
slightly higher nitrogen and phosphorous levels. Place in an
area that will receive the most sun and plant 18 inches apart with
rows 3 feet apart. Soil must be well drained. Work the
top 8-10 inches of soil several weeks before planting. Break up
any large clods. Remove rocks, weeds, etc.
If possible, spread 2-3 inches of
organic material over the planting area. You can use materials
such as compost, leaves, peat moss or rotted hay. Work it into
the top 4-6 inches of soil. Work the garden soil only when it
is dry enough not to stick to the garden tools. This is
particularly important if you have clay soil.
Planting: Two to 3
weeks after your last frost, plant out your healthy, green plants
6-8 inches tall. Make the transplant holes at least 3-4 inches
deep so they will grow roots from the stem and better feed the
plant. Small fruiting varieties can go in at 1-1.5 feet
apart. Bell pepper plants will require more space, and may
require staking or caging to support the heavy fruit, so get those in
place at planting time. Choose a cloudy day or an evening to
plant.
Watering: Water the
plants slowly and deeply to help grow a strong root system. Do
not let them wilt, or yields and fruit quality will be
low. Prolonged hot days may require that you create some
temporary shade for them during the hottest part of the
day. Use anything from sheets of cardboard or wood, or erecting
a frame to hold an opaque blanket, etc. that will shade the
plants.
Keep the watering regular to avoid
alternating wet and drought. Fluctuating moisture levels will
cause wilt and blossom end rot.
Harvesting: Pick
peppers at either their immature green stage, or when they reach
their fully ripe red, orange or even brown stages. Use garden
shears to cut them from the stem, as pulling them will result in
breaking off the stem. Cool them as soon as possible after
harvesting to retain flavor and quality. If you have to rush
out to pick green ones on the eve of a frost warning, treat them like
tomatoes to get a bit more ripening. Store them in layers
between sheets of newspaper in a good, sturdy brown paper
bag. Close the top of the bag and store in a slightly cool, but
dark place to allow them to ripen properly. They will shrivel
during this process.
Storing: Peppers can
be stored in the refrigerator for several weeks, but they will lose
their peak flavor after a few days, so eat them fresh or cook them up
as soon as possible.
**************************************************
RADISH
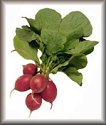 Radishes
are one of the easiest vegetables for the home gardener to cultivate,
and they can be grown in all climates. They grow quickly and
become hot and bitter if left in the ground too long. The small
globe varieties are eaten fresh in salads and used as garnishes,
while the long root forms are used for cooking.
Radishes
are grown throughout the year, and there are many varieties that do
well in cool weather. Sow radishes successively every two to
three weeks for a continuous crop. Radishes can be sown with
slower growing vegetables since they will mature quickly and can be
harvested long before other vegetables will need the space.
Radishes can be planted in lightly shaded places where other
vegetables would be reluctant to thrive.
Plant
seeds directly where they are to grow about 1/4 inch deep and 2
inches apart. Seedlings will appear in 1 to 2 weeks. Keep
the soil moist during the growing period. It's a good idea to
feed seedlings weekly with a complete liquid fertilizer.
Radishes
are ready to harvest 4 to 5 weeks after planting. Plants left
in the ground too long will be inedible.
**************************************************
RHUBARB
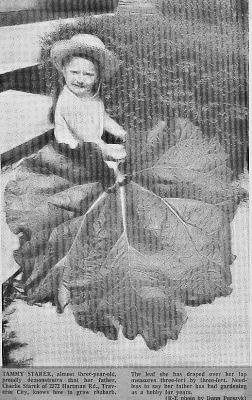 This is a very old copy of a newspaper article that the Traverse City Record Eagle ran about a rhubarb plant I grew. In this picture, my daughter Tammy was 3 years old. The rhubarb leaf was 3'X3'.
 Rhubarb
is a vegetable with a unique taste that makes it a favorite in pies
and desserts. Rhubarb is often mistaken to be a fruit but
rhubarb is actually a member of the vegetable family. Rhubarb
is rich in vitamin C.
Rhubarb
is a vegetable with a unique taste that makes it a favorite in pies
and desserts. Rhubarb is often mistaken to be a fruit but
rhubarb is actually a member of the vegetable family. Rhubarb
is rich in vitamin C.
Rhubarb is
a perennial plant.
Rhubarb
leaves grow from the ground in early spring. The leaves can
grow up to a foot or more in width and length and the plant may grow
to a height of several feet. The blade or green leaves of the
plant are poisonous. They contain high concentrations of oxalic
acid crystals which can cause serious problems when eaten.
These crystals can cause the tongue and throat to swell, preventing
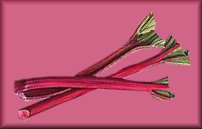
breathing. The edible stalks are up to 18 inches long, 1 to 2
inches in diameter, and generally somewhat hemispherical in cross
section. These stalks are cut and used in pies, jams, jellies,
sauces and juice.
Once
planted, rhubarb plantings remain productive for 8 to 15
years.
Rhubarb
tolerates most soils but grows best in fertile, well-drained soils
that are high in organic matter.
Rhubarb is
relatively free of insect and disease problems.
Rhubarb
responds well to fertilizers. The quality of the crop harvested
depends to a large extent on the care and fertilization
received. Fertilize each year and cultivate shallowly as often
as necessary to remove weeds.
Plant
rhubarb roots in early spring. Plant the roots with the crown
bud 2 inches below the surface of the soil. The hole for the
crown should be dug extra large and composted manure, peat moss or
dairy organic should be mixed with the soil to be placed around the
roots. Firm the soil around the roots but keep it loose over
the buds. Water the crowns after planting.
Good
garden drainage is essential in growing rhubarb. For home
gardeners, planting in raised beds helps ensure against rotting of
the crowns.
Rhubarb
responds to good care and watering. Remove the flower stalks
as they are seen. During the first year of planting, the stalks
should not be picked, since food from the leaves is needed to nourish
the roots for the next year's growth. One light picking may be
taken during the year following planting if the plants are vigorous,
and beginning the second year following planting, the entire plant
may be harvested. When harvesting rhubarb, the first step is
to cut the stalks at the soil line or simply pull them out
individually. All of the stalks of a plant may be harvested
at one time, or pulled out selectively over a 4-6 week period.
After the stalks are cut, the leaves may be removed. If the
stems appear soft and mushy, do not eat them.
**************************************************
Root Crops: Beets, Carrots, & Radishes
 Root crops are cool-season
vegetables. Their tiny seeds germinate best in damp soil that's
between 50* and 60*F. Early spring and fall are the best times
to plant.
Root crops are cool-season
vegetables. Their tiny seeds germinate best in damp soil that's
between 50* and 60*F. Early spring and fall are the best times
to plant.
Germination:
Germination is the sprouting action of seeds, and some root
crops germinate more quickly than others. Radishes sprout in
just 2 to 3 days; turnips and rutabagas in 5 to 10 days. The
rest are slower, taking from 7 to 20 days to germinate. When
they do, tiny seedlings push their way up through the shallow soil
covering.
While the seedling develops into the
greens above the ground, a large, edible taproot forms and grows
downward. It is the major storage organ of the plant, although
it does form smaller, branching side roots to help it gather food,
oxygen and water. Some root crops have more of these hairlike
roots than others, but you can scrub or wash them off before eating
the vegetable.
Growing: As the root
grows, it expands down, out and up; often showing its "shoulders"
above the ground. The sun discolors the exposed root, turning
carrots green and turnips purple. Green shoulders on carrots
are hard and bitter, so pull the roots before they're big enough to
show above the ground or cover them with mulch or soil. The
colorful top on turnips or rutabagas taste fine.
A cross section of the roots shows that
these plants are formed in three layers: a hard core, the edible
fleshy part and the skin. The best-tasting roots have the least
amount of that tough center, and quick, steady growth helps with
that.
All root crops need food, water and
air. They also develop best if there are no soil clumps or
rocks to check their growth. Give them good growing conditions,
and you'll enjoy straight, thick, good-tasting produce. Poor or
improper soil preparation is usually to blame for crooked or forked
roots. If you've ever bitten into a woody, fibrous carrot,
you'll understand why good growing conditions are so important.
When root crops grow wild, some are
biennials, forming the root in one season and producing a flowering
seed stalk the next. In the garden, we interrupt this natural
process by harvesting the roots before they start the reproduction
process. Once the roots send up a flower-bearing stem, they are
beyond the eating stage.
Differing Growth Rates:
Root crops all vary in their growth rates, as do the
individual varieties. Short, stocky carrots or beets mature
fairly quickly, but long, tapered vegetables take longer to fully
develop. You can eat the roots as soon as they're finger or
marble size, so you have a lot of flexibility when it comes time to
harvest.
Root crops could be called the "polar
bears" of the garden because both the seeds and the plants are well
adapted to sudden drops in temperature.
Even hard frosts won't
hurt them. In fact, parsnips and salsify need about a week of
cool nights to sweeten them. This is because the carbohydrates
in the roots change to sugars when the soil temperature is between
34* and 38*F.
Don't Transplant Root Crops:
Even though you can transplant all vegetables with some
success if you're very careful and you know what you're doing,
there's really no need to transplant root crops to the home
garden. If you want earlier carrots or turnips, get out in the
garden earlier and plant the seeds.
Generally it's hard to keep the
sensitive roots of any root crop from being upset during
transplanting, and this interrupts their growth too much for them to
recover completely. Chances are you'll end up with stunted or
misshapen roots. And it's really not worth the time or effort
when they grow so well started right in the garden.
Radish Essentials:
Plant short-season or spring varieties in spring or fall,
depending on local temperatures. Ideal growing temperature is
60*F to 65*F. Cooler or warmer weather results in
harsher-tasting radishes. Plants will mature in 18 to 45 days,
depending on the variety. Plant winter types in the summer or
fall. They will mature in 45 to 70 days.
Preparation: Spring
radishes can be planted right next to rows of larger, slower growing
crops - no need to create a separate radish bed.
Planting: Sow
radishes directly in the garden. Plant spring varieties 1 inch
apart, 1/2 inch deep. To get larger spring radishes, plant
seeds 1 1/2 inches deep, 1 1/2 inches apart, in rows 24 inches
apart. Plant winter radish varieties 1 to 3 inches apart.
Care: When young
radishes are 1 inch tall, thin to 2 to 3 inches apart. Provide
even watering. Heat and too little or uneven watering can
result in tough, pithy, very hot radishes.
Harvesting: Pick
spring varieties as soon as they reach the size you
prefer. Before they become tough and pithy, pull all the
radishes, trim off the tops, and store in plastic bags in the
refrigerator. Winter varieties will keep adequately in the
ground for a few weeks after maturity, in cool weather. Store
these radishes through the winter as you would carrots or beets, in
sawdust or peat moss.
Tips on Sowing Root Crop
Seeds: The easiest way to sow root crop seeds is to
sprinkle them by hand, keeping your hand two to three feet above the
row. This scatters the seeds more evenly than if your hand is
down very close to the row. Mix some fine soil or sand with the
seeds to help even out the distribution.
You can also broadcast the seeds, mixed
with dry sand, from a salt shaker if the holes are big enough, or
right from the packet by tearing a tiny hole in one corner for them
to slip through.
Growing Root Crops:
Three essentials to a healthy crop of roots is thining, weeding, and
watering.
The First Thinning:
Thinning is a must with root crops. Crowded
conditions cause them to become stunted or twisted around each other,
and that's not good. You have to thin if you want roots that
are big enough to eat. Starting when the seedlings are
approximately 1/4 to 1/2 inch tall, you can thin by hand or use the
simple but effective iron-rake method.
Thinning with a rake is a
snap. Just pull an iron garden rake once across the row with
its teeth going into the soil about 1/4 inch. The teeth are
spaced at intervals to catch just enough seedlings, pulling them from
the row. Don't look down as you're doing this - it's a horrible
sight! You may think you've destroyed the whole row of plants,
but don't fret. The remaining ones will perk up in a day or
so.
Raking also cultivates the soil, stirring
up and killing "weedlings." Most young weeds haven't had time to
develop a deep taproot, so this initial thinning will dislodge them
before they come up, exposing their shallow roots and killing
them. Some of the worst garden weeds have very strong taproots,
and the idea is to catch these weeds before they put down deep
roots.
By thinning with a rake, you also break
any crust on the surface, aerating the soil at the same time.
You can thin by hand if the rake
technique seems a little too drastic. Simply pull up enough
plants that the remaining ones will stand one to two inches
apart. You may not trust the rake method at first, but try it
on at least part of a row. With the rake you can thin (and
weed) all your root crops in just a minute or two, whereas thinning
by hand seems to take forever.
The best time to thin is a few hours
after a rain or a thorough watering, when the soil is damp but the
plants have dried off completely. (Never weed, thin or harvest
around very wet plants, because you can spread disease from your
hands and clothing without knowing it.) Damp soil permits
seedlings to be pulled without disturbing the roots of the remaining
plants, and any weeds that start to germinate after a rain will be
uprooted, too. If it's very dry on the day you decide to thin,
water the surface of the soil, so you don't pull up more
seedlings than you intend.
Because beet seeds produce clusters of
seedlings, the simplest way to thin them is with an iron
rake. The rake teeth will uproot just the right number of
seedlings. If you thin by hand, don't try to remove any of the
seedlings from within a single cluster. It's too easy to
disturb the remaining ones. Instead, pull up whole clusters,
leaving two - three inches between them. If you like beet
greens, sow the seeds a little thicker than is usually recommended on
seed packages. When the beets are a little bigger, thin them
again; along with the greens. You'll also get a great harvest
of marble-sized baby beets.
Thinning always seems more traumatic for
the gardener than it is for the plants. People don't like to
pull up those helpless seedlings that have just barely made it
through the soil surface. Think of it as helping your whole crop
and giving you more food to eat, and it will soon be a natural part of
your garden routine.
Weeding: Try this
trick in the early spring before you even plant a seed: Wait
a week or so between the initial soil preparation and planting
day. During this time, go out several times and till or stir
the soil. This exposes and kills the first batches of tiny
"weedlings" lurking near the surface that may try to overrun your
young seedlings.
Once your plants are up, you should stir
up the soil within the rows every four or five days until the
seedlings are well established. You can save a lot of bending
over by using special hoes for weeding. Many have a strong,
narrow blade with a curved gooseneck to let you pull weeds from even
tight spots in the row without damaging the stems or roots of
vegetables.
Once the plants get too tall to use a
weeding tool, buckle down and hand pull every weed as soon as you see
it. Keep in mind that any weed that grows in your garden is a
robber, stealing sun, water and food from your crops, and in the end,
stealing food from you.>br>
To keep down weeds between the rows,
stir the soil surface there, too. Or, you can put down a
two-three-inch layer of mulch (shredded leaves, straw, lawn clippings
or even newspapers) between the rows to do the work for
you. Mulch has the added advantage of keeping the soil moist
and at an even temperature. Your root crops will really
appreciate this.
The Second Thinning and the First
Harvest: Thin again by hand several weeks after the
first thinning to give the remaining plants space to reach their
mature size. (Enjoy the thinnings of these sweet, tender "baby"
carrots and beets.) This is also when you would harvest the
radishes planted as companion plants.
The third time you go out to
thin: You'll be harvesting for real. See how you
can kill a few birds with one stone, as each chore combines with the
others?
Watering: Root crops
need about one inch of water per week. If you can supply this
water evenly, with no long dry spells to inhibit the growth of the
roots and greens, you'll encourage a healthy crop. The exception
to the one inch per week rule of thumb is the light sprinklings you
should provide after sowing the seeds and until the seedlings
emerge. Once the seedlings are up, return to the following
watering habits:
Water when your garden needs it, not
just by a calendar schedule. Don't be tempted to water your
plants if the greens are drooping in the late afternoon sun - this is
normal. But, if they look wilted before eleven o'clock in the
morning, they need water.
Another mistake gardeners often make is
to give their gardens many light waterings instead of a few thorough
soakings. Once your seeds are sprouted, soak the soil when it
needs it to a depth of four to six inches. By watering deeply
you encourage the taproot to grow down seeking the
moisture. Shallow waterings promote shallow root growth, which
is exactly what you don't want, especially if you live in a
drought-prone area.
How much does it take to water your
garden to a depth of four to six inches? If you're using a
sprinkler, set a pan in the area you're watering. When the
water is an inch deep in the pan, the nearby soil will be
sufficiently soaked-about six inches down.
Harvesting Root Crops:
Time to Eat!
Start harvesting beets and turnips early
for their greens, and baby carrots when they're the size of your
little finger.
This will give you a good start on a long
harvesting period; the roots left in the row will have more room to
grow; and you won't be faced with an entire row of vegetables ready
to be pulled on the same day. Besides, the smaller the root,
the better it tastes!
For a few extra meals of beet or turnip
greens, just go out and snip off the leaves you want. As long
as you leave some greens on the plant, it will continue to grow more
of them - as well as growing a nice big root, too.
Pull the largest roots every time you
harvest. People are tempted to leave the biggest ones, so
they'll grow even bigger. Don't do it! By pulling the
largest roots, you're sure to have them before they're so big they're
all woody and bitter. Again, this encourages the remaining
plants to fill in and grow bigger, giving you what seems like an
inexhaustible supply of medium-sized, savory roots.
Once some root crops get bigger, you may
have to wiggle them back and forth (or loosen them with a trowel,
pitchfork or spade) to get them out. If a top breaks off in
your hand, don't give up. Dig down into the soil and pull that
root! If you water the soil lightly before harvesting, the
roots will pop out more easily.
Harvest whenever you need fresh roots,
picking just enough. You should be able to enjoy all your
spring-planted root crops in this fresh, garden-to-table fashion.
Where's the Biggest Carrot?
If you want to find the biggest carrot
in the row just by looking at the greens, remember this: the bigger
the root, the darker the greens and the thicker the stem. If
some of the greens in the row look darker than the others, you can be
sure the largest carrots are underneath. With beets, radishes
or turnips, the greens with the thickest stems will point the way to
the biggest roots.
How to Store Root
Crops: Here's how to have the produce from your fall
garden last long andkeep well in storage: Have your fall
garden of root crops mature as late as possible by planting as late
as possible. Cold weather sweetens the roots and you'll be
putting the freshest produce into a cool root cellar, garage or back
porch. Leave your last planting in the ground until the roots
are fully mature; they'll store better if they're protected by a
thicker skin.
Whether you're going to eat most of your
vegetables fresh, or you intend to freeze, can, or store them in a
root cellar, a good rule of thumb is to harvest as close to the time
you're going to eat or preserve them as possible. This gives
you the best flavor and nutrition.
For a longer storage life, dig up the
roots from your fall garden after two or three days of dry
weather. Your root crops will be dry, and by leaving them out
for a few hours in the sun right after you pull them, you'll kill the
root hairs, making the plant dormant, and the soil on the roots will
dry and fall off easily.
Cut beet stems to 1 inch before storing.
Never wash roots before you store
them. Just cut off the tops right out in the
garden. Leave about an inch of stem for beets, so they don't
"bleed" in cooking. For other root crops, cut the tops
close. Wash the roots just before using them.
Only store the best roots. Injuries
are avenues of rotting that can spread to the other
vegetables. (Yes, one can spoil a whole bunch!) If you
should bruise any, eat them right away. Also, don't ever clip
off the bottom end of the root before you put it in storage; this
too, can cause the plant to rot.
Storage - Plain or
Fancy: You don't need an elaborate root cellar to store
vegetables, even for months at a time. You can easily extend
the fresh life of root crops using whatever storage space you
currently have. The length of storage time may vary according
to your storage method, but with any of the methods described below,
you can be sure of at least a few extra months of fresh
vegetables.
To stay crisp and fresh, root crops just
need cool, moist, dark surroundings. Whether you have a root
cellar or just a spot under the back porch for storage, the most
important element for long vegetable life is an even, cold
temperature. Variations up or down of even five degrees can
cause new growth to sprout (which you don't want) or
rotting. Here, insulation is the key. There are many ways
to give your roots the insulated low temperature they need.
In-ground storage is the least
expensive, most carefree root storage.
If you have an unheated basement, you
can build a root cellar by partitioning off one corner, installing
some insulation and a good, sound door. You're actually making
a refrigeration unit.
The temperature inside the root cellar
will be coolest near the floor, and that's the place for your root
crops. Don't put them right on the floor - it may be too
damp. Raising them up on a few boards should do the trick.
Place first layer of vegetables on 2 to
3 inches of insulating material.
Cover vegetables with 1/4-inch layer of
insulation.
If your cellar is cool but not insulated,
a large, sturdy cardboard or wooden box with two to three inches of
some insulating material (sawdust is best, and moist peat moss or
sand also works well) on the bottom and sides will do
fine. Place a layer of carrots on top of the sawdust, leaving
two to three inches of space near the sides. Cover the carrots
lightly with sawdust - 1/4 inch is fine. Alternate layers of
carrots with sawdust, filling in all around the edges with sawdust as
well. Add a final two to three inches of sawdust on top, and
store this "root box" in a cool basement area.
Here are some other storage methods that
work in a cool cellar. Put the roots in a plastic trash bag,
punch a few small holes in it, tie up the top and store the
bag. Or, put your roots into a trash barrel with a plastic
liner, put the lid on and store the whole thing.
If you have no cellar, you can still use
the insulated box method. But you'll need a really large
box. Line the bottom, sides and top with four to five inches of
sawdust or peat moss. Pack the roots in the sawdust and store
the box in a cold place - your garage, back porch or an unheated
spare room. Whenever you need some vegetables, just take them
out and repack the sawdust around the rest.
Roots can touch each other in storage,
just don't pack them in tightly. Some moist air must be able to
circulate.
If your vegetables freeze in storage,
don't panic. You can still use them. But once they've
thawed they won't keep for more than a day or so.
Of course, if you really want to keep it
simple, your refrigerator crisper drawer will keep roots fresh for
several months, but you can only store a limited amount this way.
Combining Root Crops:
Interplanting and succession planting
are two ways to extend your harvest season. Here's how.
Interplanting: In
addition to radishes, you can plant any root crop with other
vegetables and get terrific results. Combine carrots and lettuce
in a row, for example, or plant turnips with spinach, chard or
lettuce. For a real smorgasbord, mix carrots, radishes and
onions in one row. Every time you harvest one crop, you
cultivate the row. The remaining roots benefit from the
additional room you leave. Talk about growing a great salad in
one garden spot!
When you decide to combine your plants,
choose partners that won't smother each other. For instance,
the fast-growing cool-season crops such as lettuce and spinach will
be ready to harvest before the slower-growing root crops need the
same sun and space. You should harvest or pull the first crop
completely to guarantee the success of the second.
Succession Planting:
To have a constant supply of fresh root crops through the
summer and fall, you can plant small groups of seeds two to three
weeks apart, starting in early summer.
**************************************************
TOMATOES
 Tomatoes are a good source of Vitamin A and fair source of
Vitamin C.
Shopping For Transplants:
Take the time to pick out plants with thick stems (the
thicker the better) and large root systems, best indicated by a dark
green plant in a deep container. The tallest transplants are
not necessarily the best ones. Don't pick out a plant with
blossoms or fruits. Unless it's in a deep pot, it won't have a
strong enough root system to support the fruit yet.
Tomatoes are a good source of Vitamin A and fair source of
Vitamin C.
Shopping For Transplants:
Take the time to pick out plants with thick stems (the
thicker the better) and large root systems, best indicated by a dark
green plant in a deep container. The tallest transplants are
not necessarily the best ones. Don't pick out a plant with
blossoms or fruits. Unless it's in a deep pot, it won't have a
strong enough root system to support the fruit yet.
Be wary of plants with blemishes or poor
color. Also, check the undersides of the leaves for aphids
(small, pear-shaped insects) or tiny whiteflies. You don't want
to bring these pests near your garden. They multiply rapidly
and can cause lots of problems.
Transplanting Tomatoes:
Transplanting is a major step. Rushing your plants
into the ground before they're properly hardened off, or roughing up
the tomatoes' roots when you're handling them, can set the crop
back.
There are just a couple of basic ways to
transplant.
Basic Guidelines
Here are some general guidelines for
transplanting.
*Soak the transplants with a water and fish emulsion
or seaweed mix in their flats an hour before
transplanting. This helps to retain soil around the root, makes
the root mass easier to handle and applies a quick feed of soluable
fertilizer.
*Have everything ready before removing the plants
from the flats. Have the soil prepared, the fertilizer applied
in the furrow or in the holes, all tools at hand, etc.
*Don't put too much fertilizer under the
plants. Excessive fertilizer shocks and burns
plants. It's better to hold off and give them extra nourishment
later when they're established.
*Protect against cutworms. These ground-level
pests can chew completely through thin tomato stems. Before
putting tomato plants in the ground, wrap a newspaper collar around
the stems to protect the plants. The collars should span from
an inch or two above the soil surface to an inch or two below the
cutworm's territory. The collars are easy to use and last long
enough for the stems to grow enough to discourage
cutworms. Tight collars of plastic can restrict the stem
growth, so never use them.
*Working quickly, cup the roots in one hand as you
remove the transplant from its container, and tuck it into its home
in the garden. A smooth and speedy transition from flat to soil
means less of a shock to the plant.
*Keep transplants watered. They need water in
the beginning to help them get over the shock of being transplanted,
to encourage new root growth and to replace the moisture they give
off or "transpire" because of heat or drying winds.
Staking Tomatoes: To
keep tomato plants from gobbling up too much garden space and to
insure cleaner, healthier tomatoes, many gardeners support their
plants, train them to grow a certain way and regularly pinch off
unwanted growth. Staking is one popular way of supporting
tomatoes.
Advantages of Staking:
* It saves space. You can grow more plants in
a given area.
* It keeps vines and tomatoes off the
ground. Fruit is cleaner with less rotting.
* You'll get an earlier harvest. The pruning
that staked tomatoes require forces more of the plant's energy into
ripening fruit.
* Each tomato is larger than if not
staked. Pruned plants put more energy into fewer tomatoes.
* It's easier to pick tomatoes and to work around
plants.
Disadvantages of Staking:
* It takes time and effort to stake, train and prune
plants.
* Staked tomatoes are more susceptible to cracking,
blossom end rot and sunscald problems.
The total
yield of staked plants is often lower than similar plants that are
not staked. You have to prune off side shoots and branches to
support the plant with a stake and that actually reduces the total
leaf surface of the plant. The leaf surface is the site of the
plant's food manufacturing operation, so less leaf surface means a
smaller total food supply, and that affects total yield.
Staked
plants usually need mulching with materials such as hay or grass
clippings. The mulch helps retain moisture in the
soil. Staked plants actually need more water than unstaked
tomatoes because they are held up and exposed to the sun and drying
winds.
Not all
tomato plants need staking. Determinate tomatoes stop growing
at a certain height - usually when they're fairly short. They
stop growing because the main stem forms a flower bud at the top that
produces fruit. Most of the determinate varieties are early
types, and they're bushy plants with short, stout stems that support
them pretty well. Some popular determinate varieties include
'First Pik', 'Oregon Spring' and 'Sub-Arctic Maxi'.
Another
group of tomatoes are the dwarf or patio types. These varieties
never need staking, grow only two to three feet tall, produce
cherry-tomato-sized fruits and are great for containers or small
gardens. Popular varieties include 'Pixie II' and 'Small
Fry'.
A new type
of dwarf tomato, called the dwarf indeterminate, combines the short,
bushy growth of dwarf plants with the long production season and
large fruit size of indeterminate types. Examples of these
varieties are 'Better Bush Improved' and 'Husky Gold'.
How to Stake:
When you
stake a tomato plant, try to put the stake on the prevailing downwind
side so the plant will lean against it when the wind is blowing
hard.
Six-to
eight-foot-high stakes are good for most tomatoes, although you can
make do with shorter four-to five-foot stakes, if necessary. Put
the stakes in the ground right after you've set out the
plants. Drive them about a foot into the soil, three to five
inches away from the plant. Remember not to put the stake on
the root side of trench-planted tomatoes. As the plant grows,
tie a strip of cloth, nylon stocking or coated wire tightly to the
stake and loosely around the plant in a figure-eight
fashion. Leave at least an inch or two of slack. Add more
ties as needed as the plant grows up the stake.
Caging: Caging is a
technique that can help you get better a better harvest. In
this method, tomatoes are supported by enclosing them in cages,
constructed of wood or wire. This way, the vine has support
without being tied. Tomatoes growing in cages do not need to be
pruned. Make sure the openings in the wire cage are large
enough for your hand holding a tomato to fit through!
You can make a good cage with a piece of
concrete reinforcement wire 5 feet tall and 6 feet wide. Put
cages over the young plants. The cage should be 24-inches in
diameter. Place the cages over the plants when they are small
and stake the cage to the ground to guard against wind damage and
breakage. Check the plants weekly and adjust the stems so they
grow up inside the cage and not out one of the side openings.
Pruning Tomatoes:
Pruning means pinching off the shoots or "suckers" that
sprout from the stem in the crotch right above a leaf
branch. If you let a sucker grow, it simply becomes another big
stem with its own blossoms, fruits and suckers! With staked or
trellised tomatoes, pinch off the suckers and just keep the energy of
the plant directed at one (sometimes two to three) main stems.
If you want additional stems to develop
besides the main stem, allow the suckers closest to the bottom of the
plant to grow. These will have more flower blossoms and are
easier to train to the outside of the plant than suckers that sprout
higher up.
Tomato plants really grow fast when the
weather warms up, and new suckers form all the time, so you should go
on "sucker patrol" at least twice a week during the heavy growing
season.
If you live in a very hot, sunny area,
you can let some of the suckers put out a couple of leaves and then
pinch out the tips to stop their growth. The sucker provides a
little more foliage to help the plant manufacture food and also to
help shade tomatoes from the sun.
Pruning Unstaked Plants:
Unstaked plants can also be pruned, although it's not as
necessary as it is for staked or trellised plants. Pruning
improves ventilation, which can help to prevent disease
problems. Pruning branches late in the season opens the plant
up to more sunlight. Then on cooler days the plants are a
little warmer, which is good for ripening tomatoes.
If you're growing determinate varieties
of tomatoes, go easy on any pruning. Because these plants are
smaller and don't continue to set new fruits throughout the season,
heavy pruning may reduce your yield drastically. Also, be
careful not to overprune in hot parts of the country. Tomato
fruits need protection from the bright sun or they may develop
sunscald. Tomatoes ripen better if they're shaded some by
foliage.
Pruning Tops of Plants:
You can pinch off the tip of the main stem above the top
blossom of indeterminate tomato varieties to keep a flourishing plant
from getting any higher. This type of pruning can be helpful
when a plant is outgrowing its support, or toward the end of the
growing season when a taller plant won't help much in terms of
increased production. At that point, you'd prefer to see the
plant put its energy into ripening the tomatoes already on the
vine.
Pruning Roots: Root
pruning is a special trick you can use to speed up the ripening of
early tomatoes. It simply involves cutting some of the roots of
a plant when it has three or four clusters of tomatoes on
it. By cutting the roots, you put quite a bit of stress on the
plant, which causes it to mature more quickly. It's as if the
plant were worried that it might not have time to complete its life
cycle, so it rushes to mature some fruit and seed. The plant
won't die if you root-prune it correctly; the growth process is
simply interrupted. But after a little rest, the plant is ready
to start producing again.
To root-prune trench-planted tomatoes,
take a long kitchen knife and make a cut down along just one side of
the buried main stem, 1 to 2 inches away from it, going down 8 to 10
inches. If the tomatoes are planted vertically, cut halfway
around the plant, 1 or 2 inches from the stem and 8 to 10 inches
deep. If a knife doesn't work well for you, try a spade or a
shovel.
Watering: Keep the
watering regular to avoid alternating wet and
drought. Fluctuating moisture levels will cause wilting and
fruit split. Splitting occurs when water has been applied to
too-dry tomatoes - the fruit soaks up the water and literally bursts
its skin!
Harvesting Tomatoes
Getting Them to Turn Red: The red
color of tomatoes won't form when temperatures are above
86*F. So, if you live where the summers get quite hot, leaving
tomatoes on the vine may give them a yellowish orange
look. It's probably better to pick them in the pink stage and
let them ripen indoors in cooler temperatures.
Tomatoes need warmth, not light, to
ripen, so there's no need to put them on a sunny
windowsill. Place them out of direct sunlight - even in a dark
cupboard - where the temperature is 65* to 70*F.
Do not store them
in the refrigerator to ripen, as they get mushy inside and lose their
quality.
Frost-Time Harvest:
Tomatoes succumb to frost, but don't panic when the
weatherman predicts the first one and your tomato vines are still
loaded with green fruit. If it's going to be a light frost, you
can protect the plants overnight by covering them with old sheets,
plastic, burlap bags or big boxes. It's usually worth the
effort because the second frost is often two or three weeks after the
first one.
If a heavy freeze is on its way, go out
and pick all the tomatoes. Green tomatoes that have reached
about 3/4 of their full size and show some color will eventually
ripen, and smaller, immature green ones can be pickled or cooked
green.
Some
people like to pull up the whole tomato plant and hang it upside down
in a dark basement room and let the tomatoes ripen
gradually. If you try this system, check them regularly to
prevent very ripe fruits from falling onto the floor.
The Shelf Method: Another
method is to put unripe tomatoes on a shelf and cover them with
sheets of newspaper. Every few days check under the newspaper
and remove ripe fruits or any that have begun to rot. The
newspaper covering helps trap a natural ethylene gas that tomatoes
give off, which hastens ripening. You can also place tomatoes
in a paper bag with an apple or banana. These fruits also give
off ethylene gas, and helps to speed the tomatoes' ripening
process.
**************************************************
VINE PLANTS
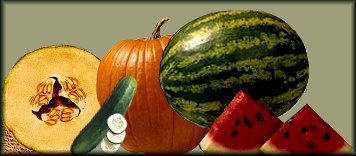 It seems
to be a law of nature that the sweetest, juiciest garden vegetables
are the ones that require the most pampering. To be rewarded
with fine melons, for instance, you have to treat the plants as if
they're on vacation - lots of sun, water, food and warm
weather. But if you treat them like royalty, they'll return the
favor by producing delectable fruits.
It seems
to be a law of nature that the sweetest, juiciest garden vegetables
are the ones that require the most pampering. To be rewarded
with fine melons, for instance, you have to treat the plants as if
they're on vacation - lots of sun, water, food and warm
weather. But if you treat them like royalty, they'll return the
favor by producing delectable fruits.
Reserve a
sunny, well-drained spot for your vine crops, preferably with a
slight slope to the south. Sunny means at least six hours of
full sun every day. The amount of space you allow depends on
how many plants you and your family want, and whether or not you plan
to support the vines with trellises or fences. If you've never
grown vine crops before, it's best to start small. Cucumbers
and summer squashes are especially heavy yielders. One hill per
person in the household should be more than enough. If you
intend to preserve or store much of the harvest, plant more.
To extend
your harvest and avoid an overdose of ripe squash or cucumbers, grow
two varieties, one that matures early and one for later. Or,
stagger your plantings for continual harvests and to avoid losing an
entire crop if weather or disease problems hit.
Some
varieties spread more than others. Keep this in mind as you
plan your garden. If you plan to use supports, leave a walkway
wide enough for you to cultivate by hand or machine. If you
intend to let the vines run freely, beware - some need lots of
room. One good place to plant vine crops is at the edge of the
garden, so the vines can spread over the lawn.
When To Plant: Wait
to plant sensitive vine crops until after the average last frost date,
unless you provide protection for them. Your local weather
bureau can tell you when the average last frost date is expected, or
ask an experienced gardener in your area. The surprising thing
is that it's usually earlier than you think.
Vine Crop Care: To
get a good crop of squash, pumpkins and other vine crops you'll need
to care for them well; weeding, watering and fertilizing.
Weed War: The most
crucial time to control weeds is when the plants are young, before
they start to run. Using a hoe, rake or cultivating tool, stir
up the top quarter-to-half-inch of soil around your plants at least
once a week.
Stay shallow as you cultivate the soil
so that you don't injure plant roots. You'll destroy the weed
seeds just below the surface; you don't have to worry about deeper
weed seeds - they can only germinate if they're near the top of the
soil.
Once the vines start spreading, the
broad leaves will shade out many weeds. However, you're bound
to get some at the edges of the patch where you left room for the
vines to travel. Rake or cultivate this area (one to two inches
deep) once a week before the vines reach it and you'll diminish the
weed problem.
Mulching: One of the
easiest weed controls of all is mulch. It also improves the
growing environment.
To mulch, simply cover the ground around
your plants with a layer of protective material (straw, hay, grass
clippings, newspapers, black plastic). This shades the ground,
making it impossible for most weeds to grow. Mulching also
conserves moisture in the soil and, with the exception of black
plastic, keeps the soil cool around the plants. This is
especially important for southern gardeners.
Wait until the soil has really warmed up
before mulching your vine crops. Straw, hay or grass clippings
need to be three to four inches thick to do the job
effectively. Alternately, five or six sheets of newspapers held
down with stones will keep the garden weed-free.
Where growing seasons are short, however,
and you want your vine crops to receive all the heat they can, stick
to black plastic or use no mulch at all.
Thinning: Young
plants need room to develop a strong root structure and
stem. If they're crowded, they will survive, but there may be
too much competition for a great crop.
If you plant six to eight seeds in each
hill and they all come up, thin out all but the best three or four
plants when they're a few inches high.
Thin plants in rows to stand 8 to 12
inches apart, depending on the variety. There's no trick to
thinning these vegetables; just pull up the smaller, least
healthy-looking plants and leave the others.
Gardeners usually discard the thinnings,
but you can also transplant them to fill in a spotty row. If
you try this, handle the seedlings with care - use a big spoon or
trowel to dig them and move them with lots of soil surrounding the
root balls to protect them.
One of the
wonderful things about having your own garden is that you control
when you harvest your vegetables. You can pick them immediately
before preparing them to ensure that you have the freshest produce
anywhere. Even better, you can also have the
youngest. Most commercial growers don't pick tiny vegetables,
knowing they'll get more for their money by waiting a few
days. But the best picks - especially for cucumbers and summer
squash - are the smallest vegetables on the vine. Don't worry
if it takes six zucchini to make a meal - there will be lots more
where they came from, so splurge! Just be careful not to step
on the vines when you harvest - you may kill the plants.
Harvesting Big Squash:
If a crop gets ahead of your harvest efforts - zucchini
has a habit of doing this - and the fruits grow large enough, the
plant will stop producing and go on to the next stage of
reproduction. You can still eat those larger vegetables,
although they won't taste quite as good as younger
ones. Cucumber skins toughen as they mature, and summer squash
loses some of its flavor.
Harvesting Melons:
There are several ways to judge a melon's ripeness, and
most people learn from experience, which is the most dependable
method. Here are tips for valid signs of ripeness for
muskmelons and watermelons.
Smell - check ripeness by smelling for a
strong, "musky" or perfumey scent around the stem-end of the
melon. That unmistakable odor means ripeness every time.
Skin - when the skin color changes from
green to yellow or tan and the netting becomes pronounced, the melon
is ripe.
Stem - as fruits start to ripen, the stems
separate or slip from the fruit, with very little pressure. A
crack appears between the stem and the fruit, signaling the prime
harvest time. When the stem finally separates completely, which
is called full slip, the melon is very ripe and won't last long
before turning soft and mushy. Watch the slip signs and try to
eat the ripest melons first to give yourself a steady supply of good
ones.
Harvesting Watermelons:
Color - check the spot where the watermelon
rests on the ground. As the melon ripens, that "ground spot"
turns from whitish to a deep, creamy yellow. Also, the melon's
shiny surface dulls somewhat when it's ripe.
Thumps - unripe melons make a sharp ringing
sound when rapped and ripe ones sound muffled. However
over-ripe melons make that same dead sound, so this isn't the most
reliable test.
Curly-cues - watch the tendrils on the stems
to judge ripeness. When the tendril closest to a fruit turns
brown and dries up, the melon is ripe. Beware, though: Some
varieties may show this sign and not ripen for several more days, so
you could be disappointed.
**************************************************
ZUCCHINI
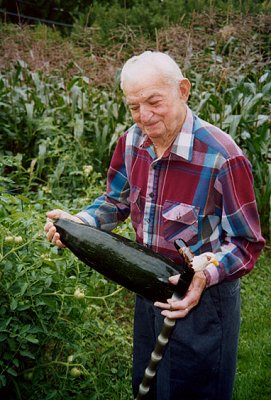 This
squash family member is best when picked very young. Bushes
are quite hardy and the plant is ideal for containers. The
shape is elongated and both green and yellow varieties are
available. Young zucchini is excellent in salads while older
varieties are better cooked.
This
squash family member is best when picked very young. Bushes
are quite hardy and the plant is ideal for containers. The
shape is elongated and both green and yellow varieties are
available. Young zucchini is excellent in salads while older
varieties are better cooked.
Conditions:
Zucchini is a warm weather fruit and will not tolerate
frosts. It requires full sun to partial shade and will do well
in almost any soil with good drainage. Zucchini is a heavy
feeder and the addition of compost and well-rotted manure will
greatly improve its growing results. When flowers begin to
form, you will want to side-dress with more manure. Keep the
garden free of weeds which may harbor disease. Cultivate
lightly so as not to disturb the shallow root structures.
Planting: Plant
when soil has completely warmed. Plants can be started
indoors 4 to 6 weeks ahead to speed harvest. To sow directly
outdoors, place several seeds 1/2 inch deep in a wide, saucer shaped
depression. Depressions should be 8 inches deep and
excavavated soil should form a rim around the depression. Leave
3 feet between these "hills". Thin to 3 plants per hill once
the true leaves appear. Remove unwanted seedlings by cutting
them off with scissors at ground level.
Watering: Try to
keep the water off of the leaves and foliage. Insufficient
water will cause the fruit to fall off before it matures.
Leaves will wilt during very hot weather, but will recover when
watered.
Problems: Powdery
mildew and mosaic virus are the main problems. Good
preventative measures include not handling the vines when they are
wet, planting in an area with good ventilation, and keeping the
garden clean and free of weeds and debris. Most insects that
attack zucchini can be controled by spraying with a good herbal or
natural insecticide.
Harvesting: Pick
zucchini early and often. Fruit that is 4-6 inches long will
have the best flavor, and picking encourages more fruit.
**************************************************
Some of the information & gardening tips were aquired from National Gardening editors & other sources as well as my own experience.
**************************************************
Here's a good source of information.


Copyright © 2001 - 2013
All Rights reserved:
Charlie's Star-X
|
|
